Lets begin with the basics: webhooks are messages that apps automatically send to other apps when an event occurs, ultimately a way to push data and information from one app to another. This data exchange happens over the web - that is, using the HTTP(s) protocol - and in the majority of cases, the actual data is sent using the JSON format within the HTTP request body. When configuring a webhook, the sending app becomes acquainted with the webhook URL - the target URL that the receiving app is listening to, waiting for events.
Using Cron To Go’s webhook notifications, you may notify other apps when jobs start, complete or fail for better monitoring or as a means to implement tighter integration with your code - to apply a rollback mechanism if a job fails, for instance.
This post will provide you with a step-by-step guide to setting up webhook notifications in Cron To Go. Our examples will use a webhook.site endpoint as the webhook URL, which is excellent for testing purposes. Once you’re all set with your own app code, you should set the webhook URL to your app’s URL and make sure that you’re handling the requests appropriately.
Step 1: Add a new webhook
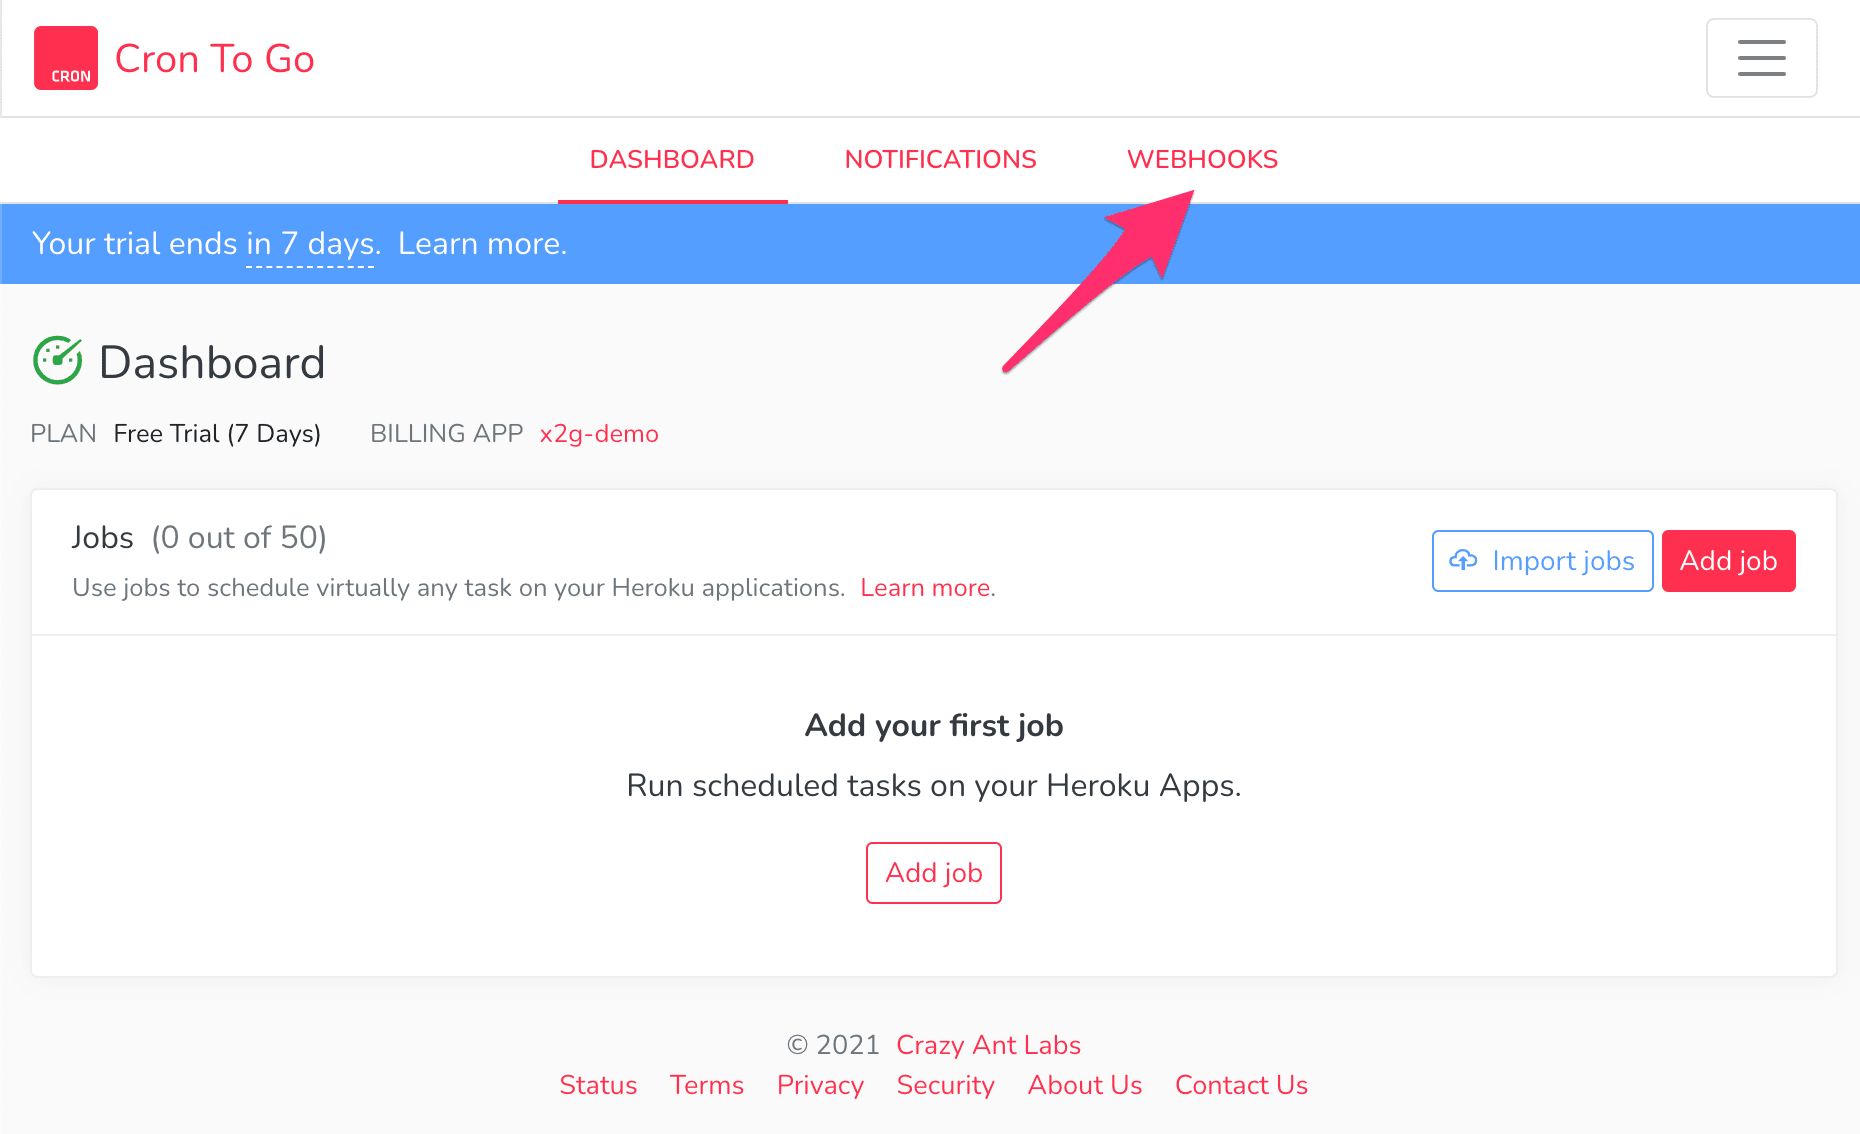
- Open your Cron To Go dashboard.
- Click Webhooks in the top menu
- Click Add webhook
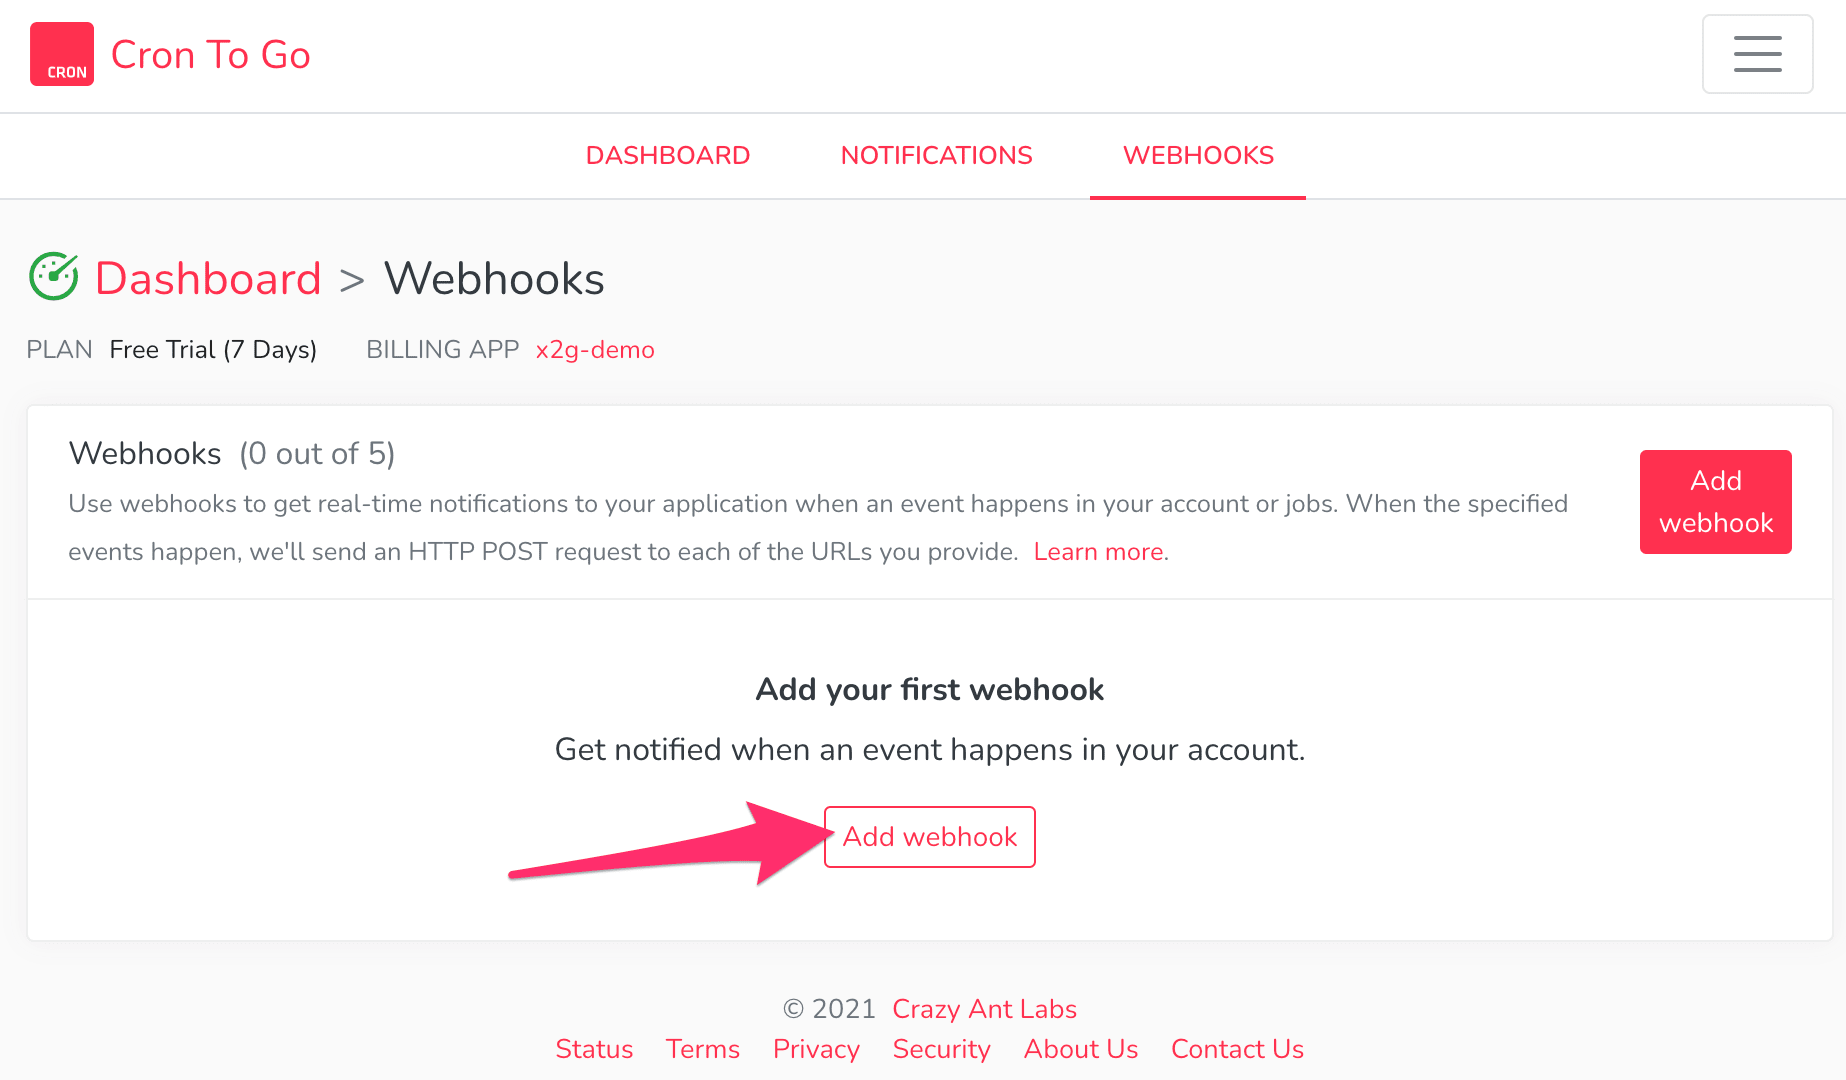
- In the dialog that opens, fill out the following:
- Nickname - a descriptive name for your webhook.
- Endpoint URL - HTTPS URL of your server endpoint that will receive all webhook notifications.
- Authorization header - if your app requires authorization, or if you want to make sure that it’s Cron To Go that’s sending you requests, you can fill in a value to use in the Authorization header along with the webhook request.
- Topics - select the types of notifications you want to be informed about. Depending on your use case, you may want to select one or more of the topics:
- Job Execution Failed - occurs whenever a job fails to complete
- Job Execution Started - occurs when a job execution starts
- Job Execution Succeeded - occurs when a job completes successfully.
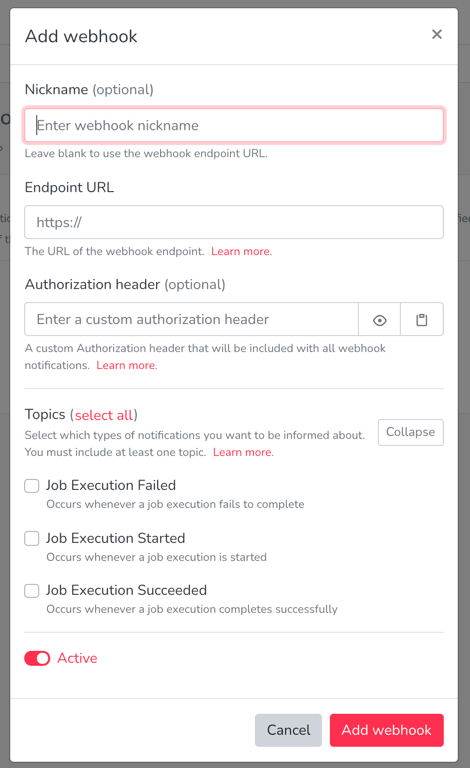
- Click add webhook.
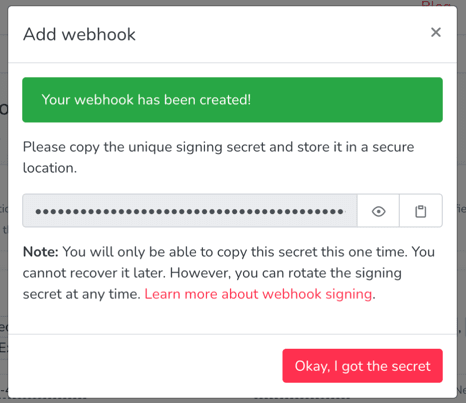
- A signing secret is generated and displayed once for you to copy. Each request is signed by Cron To Go in the webhook request’s
X-Hub-Signatureheader. If you’d like to verify the authenticity of our request, copy the signing secret and use it to verify the webhook signature. You can rotate the signing secret at any time to be assigned a new one.
Step 2: Try out your new webhook
Now that you’ve set up the webhook, you should test it to make sure that it’s working adequately on the receiving end too. The easiest way to test it is to send a ping webhook:
In the webhooks panel in Cron To Go, Click your webhook’s Actions menu and choose Ping webhook.
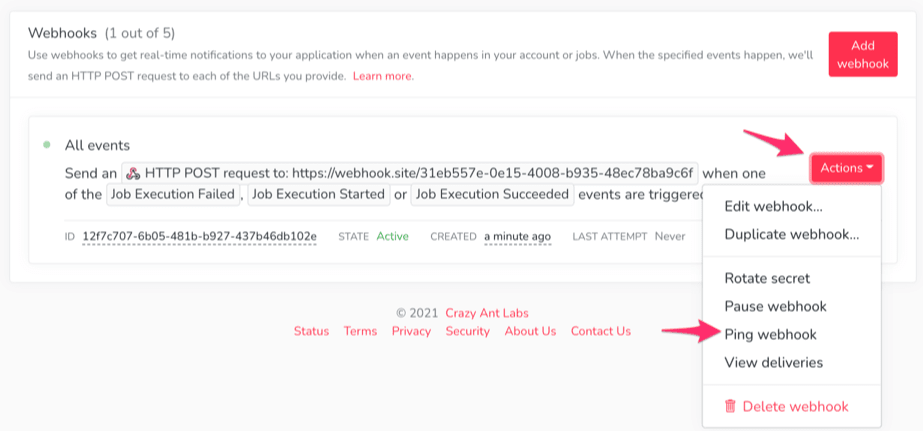
- Click Yes, ping this webhook.
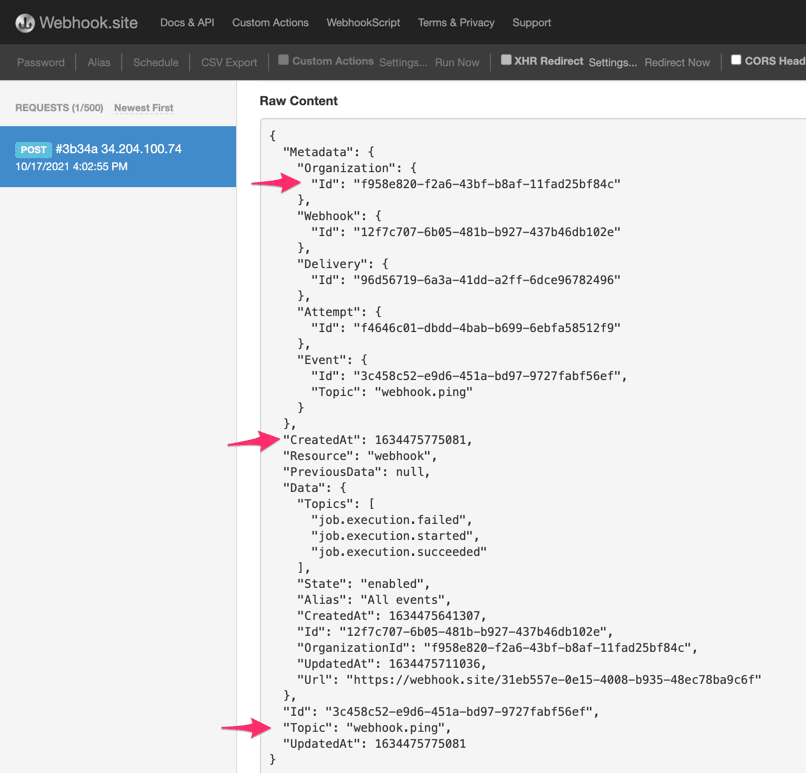
- Check that your app received and handled the webhook. Keep in mind that it should respond with a 200-level status code. If you’re using webhook.site to test out the webhooks, you’ll be able to view the request headers and body. Within the payload, note the
CreatedAtkey, which tells you when the event occurred, and theTopicwhich tells you that it’s a “webhook.ping” event. TheOrganizationIdidentifies your Cron To Go add-on instance.
You can also wait for a job to start or start a job manually to test out the webhooks.
The Data key in the request payload contains important information such as the Job ID, command, job state, exit status, and error message.

If you’re interested in learning more about the webhook payloads, you can read more about them here, or watch our quick video tutorial:
Post photo by Andrey Metelev on Unsplash