About Cron To Go
Cron To Go is a Heroku add-on dedicated to running background tasks with flexible scheduling. It is used for running repetitive jobs such as maintenance and reporting, routinely at predetermined times, dates or intervals. There are a number of other use cases associated with Cron To Go, and it’s versatility means you won’t have to worry about manually managing background work.
About Heroku
Heroku is a cloud Platform that provides users with services and tools to help with developing, operating and managing your apps in the cloud quickly and efficiently, with the help of add-ons such as Cron To Go.
Follow this guide to successfully get started with Cron To Go on Heroku:
1. Sign up to Heroku
If you’re already on the Heroku wagon and have an existing account, you can skip on over to step 2: Add Cron To Go to your Heroku app.
If you haven’t signed up yet, read on!
- Go to https://signup.heroku.com, fill out the sign up form, and click create a free account.
- Go to your inbox and open the confirmation email from Heroku. Click the link, go back to Heroku and set your password.
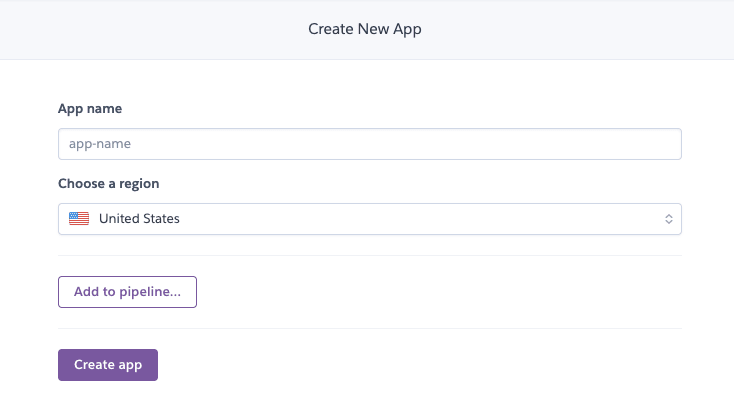
- Create a new app.
- Give the app a unique name and pick the region it will be running in.
- Your new app dashboard will now be revealed! Congrats! Next, enter your credit card details. Heroku only bills you per use, meaning you are only charged if you install an add-on or start an app dyno.
- Click your avatar on the top right corner of the screen and then account settings. On the following screen, click billing and then add credit card. Fill out the required fields to provide your credit card details.
- Normally, you would now proceed to deploy code to this application and run it in Heroku, using some parts of your code to run as jobs in Cron To Go. In the example below, we’ll just run a simple command that doesn’t require deploying any code.
- Go back to your app dashboard to add Cron To Go.
2. Add Cron To Go to your Heroku app
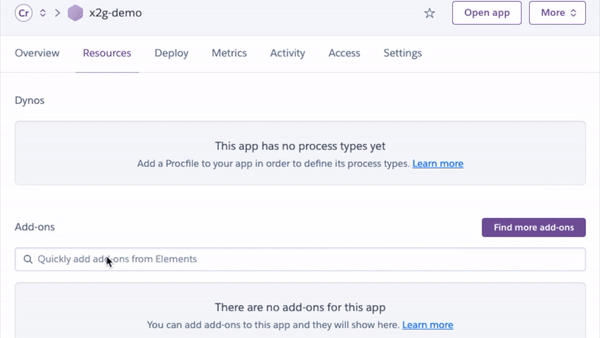
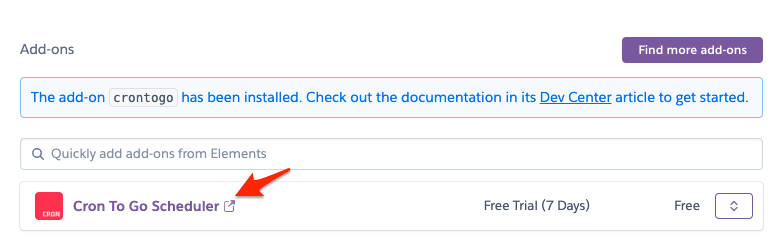
In your app dashboard (new or existing one), click the resources tab and then under Add-ons type in cron to go, pick your plan and click submit order form:
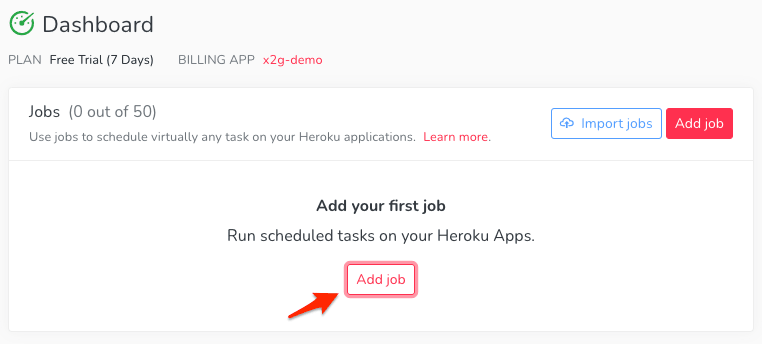
3. Create your first job
- Open the Cron To Go dashboard by clicking Cron To Go Scheduler found in your Heroku app dashboard.
- Click the Add job button located in the middle of the page:
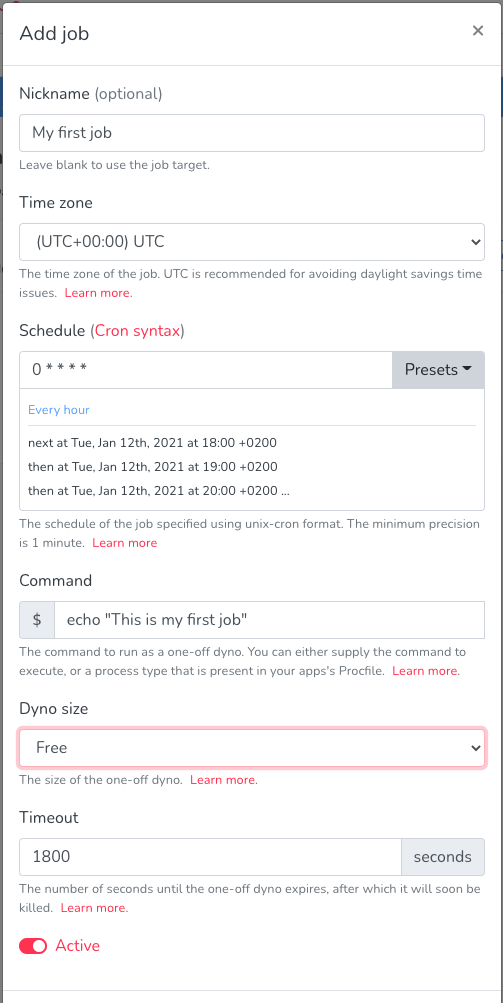
- Fill out the following job details:
- Job nickname - descriptive name that helps figure out what this job is doing.
- Time zone - according to which the job is triggered. In most cases, UTC is recommended.
- Command to execute - If you are not sure about it, ask your programmers.
- Schedule - defined with a Cron Expression. If you’re not familiar with the format, you can use our presets and refer to our complete guide to Cron expressions.
- Dyno size - this defines the amount of memory and compute power available for your job.
- Timeout - the number of seconds after which the job will be killed by Heroku. This is useful when something goes wrong and your process hangs.
Three easy steps, some minor technicalities, and nothing you can’t handle. If you do happen to have any questions or need assistance, reach out to us via our in-app chat!