
Effective cron job management is your key to maintaining application performance and reliability, especially as your application scales.
Cron To Go on Heroku provides a powerful solution for handling scheduled tasks, and monitoring them to ensure they run smoothly even under heavy load.
With Cron To Go, you can efficiently manage the scaling of your Heroku application by scheduling tasks that automatically adjust the number of dynos based on predictable usage patterns.
While Cron To Go handles numerous jobs without hiccups, you’ll still need to request that Heroku increase the number of concurrent one-off dynos for large-scale operations.
This guide will walk you through the steps to use Cron To Go to efficiently scale your Heroku application, with a focus on time-based scaling.
It offers practical insights and techniques to optimize your setup, including using cron jobs to automatically scale the number of dynos during business hours and scaling down during off-peak times. This ensures application performance and cost savings.
Step 1: Provision Cron To Go
To start, add Cron To Go to your Heroku application.
- Log into Heroku and open the CLI.
- Use
cdto navigate to the root directory of the Heroku app where you intend to add Cron To Go. - Run the following command:
$ heroku addons:create crontogo:gold This command attaches the Cron To Go add-on to your application, enabling you to start using it. The gold plan gives access to all features, so you can explore its capabilities in full. You can find other pricing plan info, Here.
4. Once the add-on is provisioned, you’ll see a confirmation message in the terminal, indicating that Cron To Go has been added to your app.
Step 2: Access the dashboard
To start, you’ll need to add the Heroku CLI buildpack to your app and set the Heroku API key as an environment variable. You can find detailed instructions on how to do this in our post on How to Schedule and Automate Jobs Using Heroku CLI.
Once you’ve set up the buildpack and environment variable, you’re ready to access the Cron To Go dashboard via the Heroku dashboard:
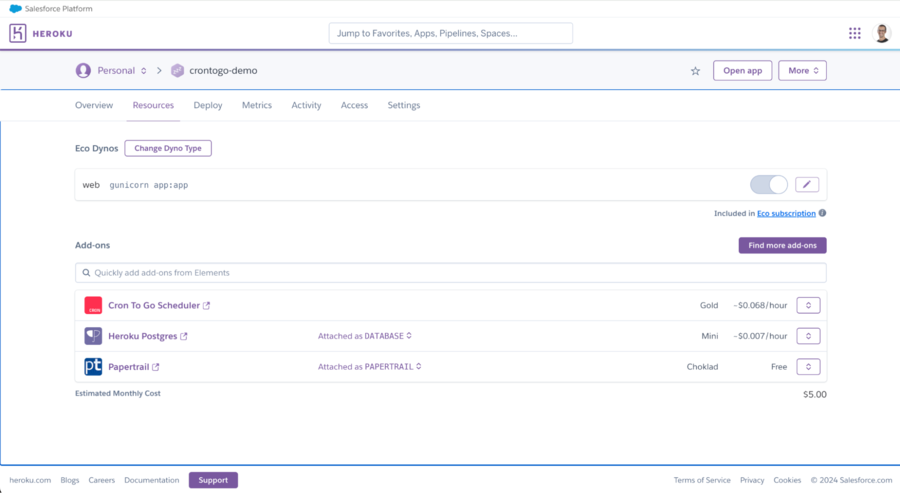
- Navigate to your Heroku app.
- Go to the "resources" tab.
- Click on "Cron To Go" under the add-ons section.
Step 3: Set up scaling jobs
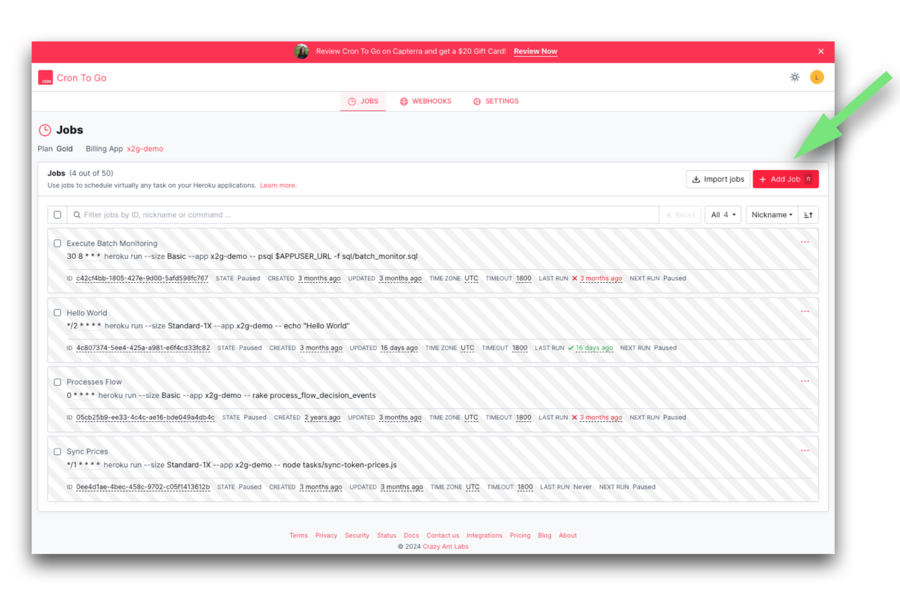
Setting up a scaling job is straightforward. In the Cron To Go dashboard, click "Add Job".
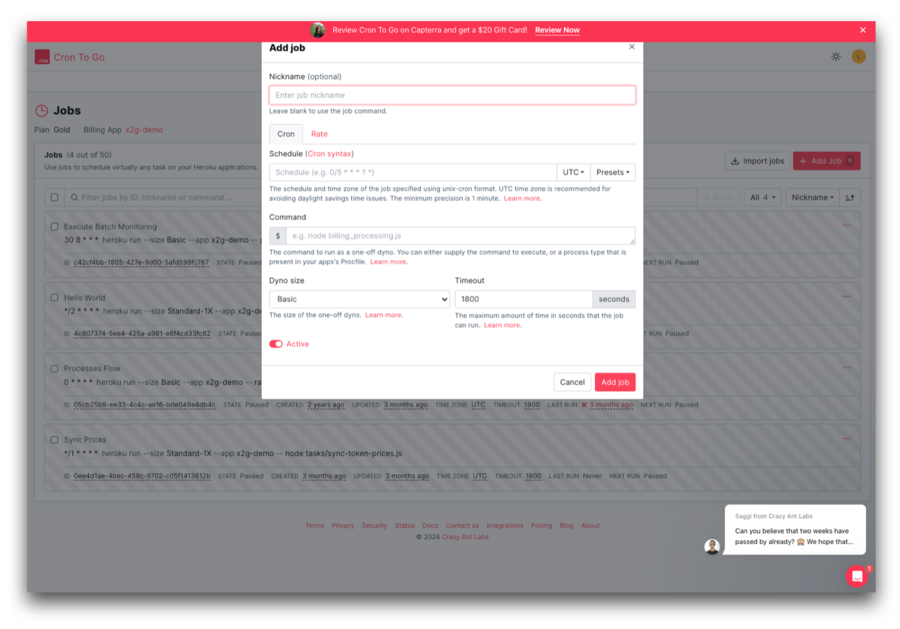
Then, fill in the details:
- Job nickname: a descriptive name for your job, such as Scale up for peak hours / Scale down for off-peak hours.
- Time zone: While Heroku apps run on UTC by default, you can set your Cron To Go schedules according to your local time zone. This is particularly useful if you want your scaling to align with local business hours and adjust automatically for daylight saving time.
- Command to execute: Use commands to scale dynos up or down, for example:
heroku ps:scale web=3 for scaling up
heroku ps:scale web=1 for scaling down
Here, "web" refers to the process type defined in your Heroku app, and the number indicates how many dynos you want to allocate to this process type. The specific number of dynos you need will depend on your app's load and how it is built.
- Schedule: use cron expressions for scheduling (e.g,
0 8 ** 1-5for weekdays at 8 AM in your local time zone and0 18 ** 1-5for weekdays at 6 PM). Adjust the schedule to fit your local business hours and optimize for your app’s usage patterns. - Dyno size: choose an appropriate dyno size based on your application’s needs.
- Timeout: set a timeout to prevent long-running jobs from consuming resources indefinitely.
It’s important to understand the process type and how to allocate the right number of dynos, so you can optimize the scaling of your Heroku application based on your needs.
Heroku's application metrics can help you make informed decisions about scaling by providing important metrics like response time and throughput.
- Response Time: Median, 95th percentile, and maximum response times to gauge how quickly your app is responding to requests.
- Throughput: The number of requests handled by your app, broken down by HTTP status codes (1XX, 2XX, 3XX, 4XX, and 5XX).
Step 4: Monitor and debug jobs
Effective monitoring and debugging are essential factors in maintaining high availability. Cron To Go provides several features to help with this:
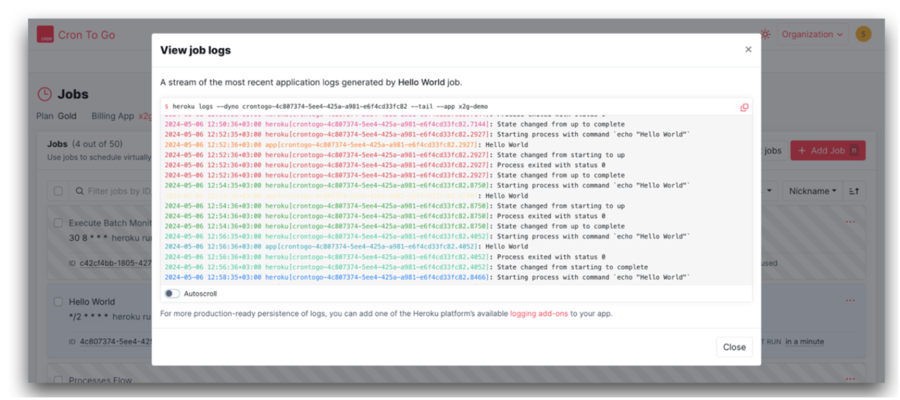
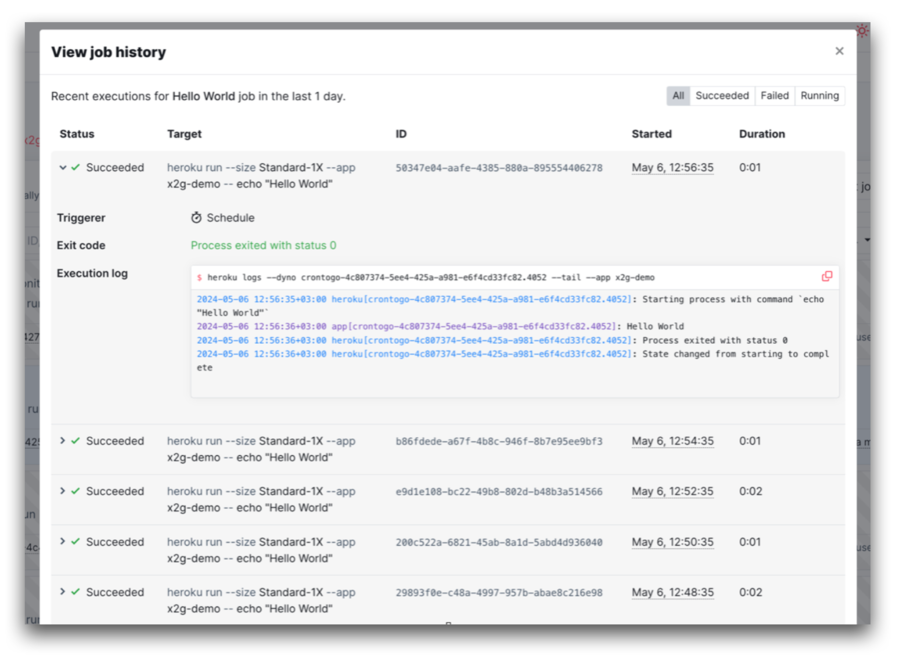
View logs and histories
Use the dashboard to view real-time logs and histories of job executions.
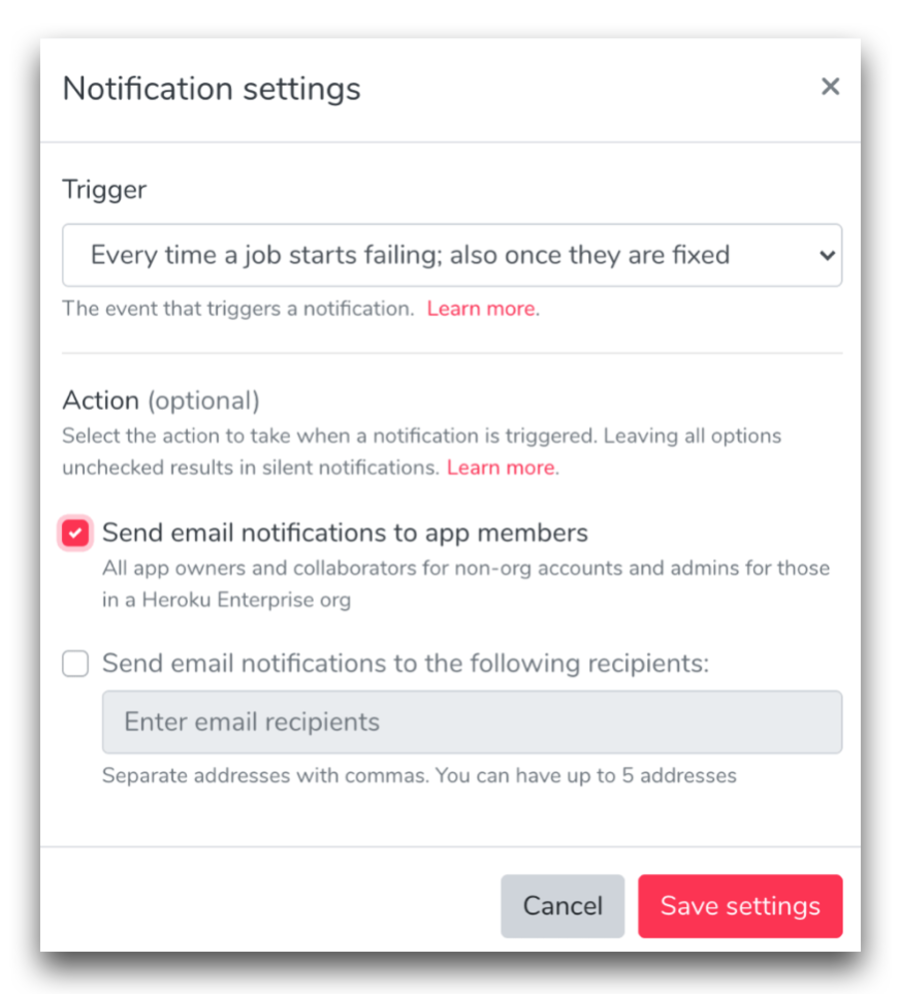
Email notifications
Set up email notifications that alert you to job failures and completions.
Webhooks
Configure webhooks to receive real-time updates on job statuses.
Cron To Go lets you:
- Select topics: Choose specific job events you want notifications for, such as job execution started, job execution succeeded, or job execution failed.
- Apply rules: Set rules to filter webhook notifications based on job attributes or conditions, like alerting only on jobs that fail or have specific properties.
- Choose notification formats: Receive webhook notifications as HTTP POST requests to a URL of your choice, or integrate with services like Slack, Microsoft Teams, or email.

To set up webhooks, watch this guide.
Step 5: Handle job failures
Job failures can disrupt your operations, so it's important to have mechanisms in place to handle them if and when they do occur:
Automatic retries for Heroku API-level errors
Cron To Go automatically retries jobs that fail due to temporary Heroku API issues like timeouts or transient errors. This feature requires no additional configuration, ensuring your scheduled tasks are resilient to platform-level disruptions.
Manual retries for application-level errors
If a job fails due to an application error (e.g., a non-zero exit code), you can manually retry the job using the Cron To Go UI, API, or CLI. This approach allows you to address specific issues and re-run jobs as needed.
Integrate retry logic into commands
For jobs prone to intermittent issues, incorporate a retry mechanism directly into your cron commands.
For example, using a shell script:
for i in {1..5}; do [command] && break || sleep 5; doneReplace [command] with your actual command, such as:
for i in {1..5}; do python backgroundjob.py && break || sleep 5; doneThis script retries the command up to five times, pausing for five seconds between attempts.
Step 7: Optimize for cost
To really scale sustainably, you need to optimize costs. Here’s how to manage your costs with time-based scaling:
Efficient scheduling
Schedule jobs during off-peak hours to minimize resource usage.
For example, scale down your dynos during nights and weekends when the app is not in high demand, and scale up during business hours when traffic is expected to be higher.
This way, you avoid paying for resources that are not being used.
Use one-off dynos
With Cron To Go, you can run one-off dynos only when jobs are scheduled to run, rather than keeping dynos running continuously. This can significantly reduce costs since Heroku charges based on dyno uptime.
In conclusion
Using Cron To Go to autoscale your Heroku application will help you to ensure that your resources are managed efficiently, maintaining high performance while reducing costs—even under heavy loads..
By practicing time-based scaling, you can optimize the allocation of dynos, scaling up during peak hours and scaling down during off-peak times.
Cron To Go is perfect for this, as it’s designed to facilitate maximum scaling and availability, keeping your app reliable and cost-effective.
For more detailed information, refer to Cron To Go Documentation.
Frequently Asked Questions
What is Cron To Go?
Cron To Go is a Heroku add-on that allows you to run scheduled tasks with high reliability and scalability. It provides features like real-time logs, email notifications, and webhooks to monitor job executions.
How does Cron To Go differ from other schedulers?
Cron To Go offers advanced features such as precise scheduling with cron expressions, support for multiple time zones, and the ability to distribute jobs across different dyno types for high availability.
How do I handle job failures in Cron To Go?
Cron To Go lets you configure retry policies and set up email or webhook notifications to handle job failures. You can also view logs to debug issues promptly.
How do I monitor my jobs in Cron To Go?
You can monitor your jobs using the real-time logs available in the Cron To Go dashboard, set up email notifications for job status updates, and configure webhooks to integrate with your monitoring tools.