
Are you currently using Advanced Scheduler but would like to give Cron To Go a try without putting in the extra leg work? Well, you’re in luck because we had you in mind when adding the option to import jobs directly from Advanced Scheduler with just a few clicks of a button. Keep reading for a quick and easy 3 step guide explaining how to import your Advanced Scheduler triggers into Cron To Go.
Step 1 - Allow API calls to your Advanced Scheduler add-on
Advanced Scheduler allows you to use API calls starting with the Premium 2 plan. If you’re at a lower plan, use the CLI or Heroku’s UI to upgrade your plan. Don’t worry - you’re only going to upgrade for a few minutes and you’ll only be charged for the time you’ve been on this plan.
heroku addons:upgrade advanced-scheduler:premium-2 -a [YOUR APP NAME]
Next, open Advanced Scheduler’s dashboard and generate an API token. Then, click Reveal API Token and copy it to your clipboard. We’ll soon be using it:


Step 2 - Install Cron To Go
To install Cron To Go, use your Heroku app dashboard or the CLI.
heroku addons:create crontogo:free-trial -a [YOUR APP NAME]
Step 3 - Import Advanced Scheduler triggers
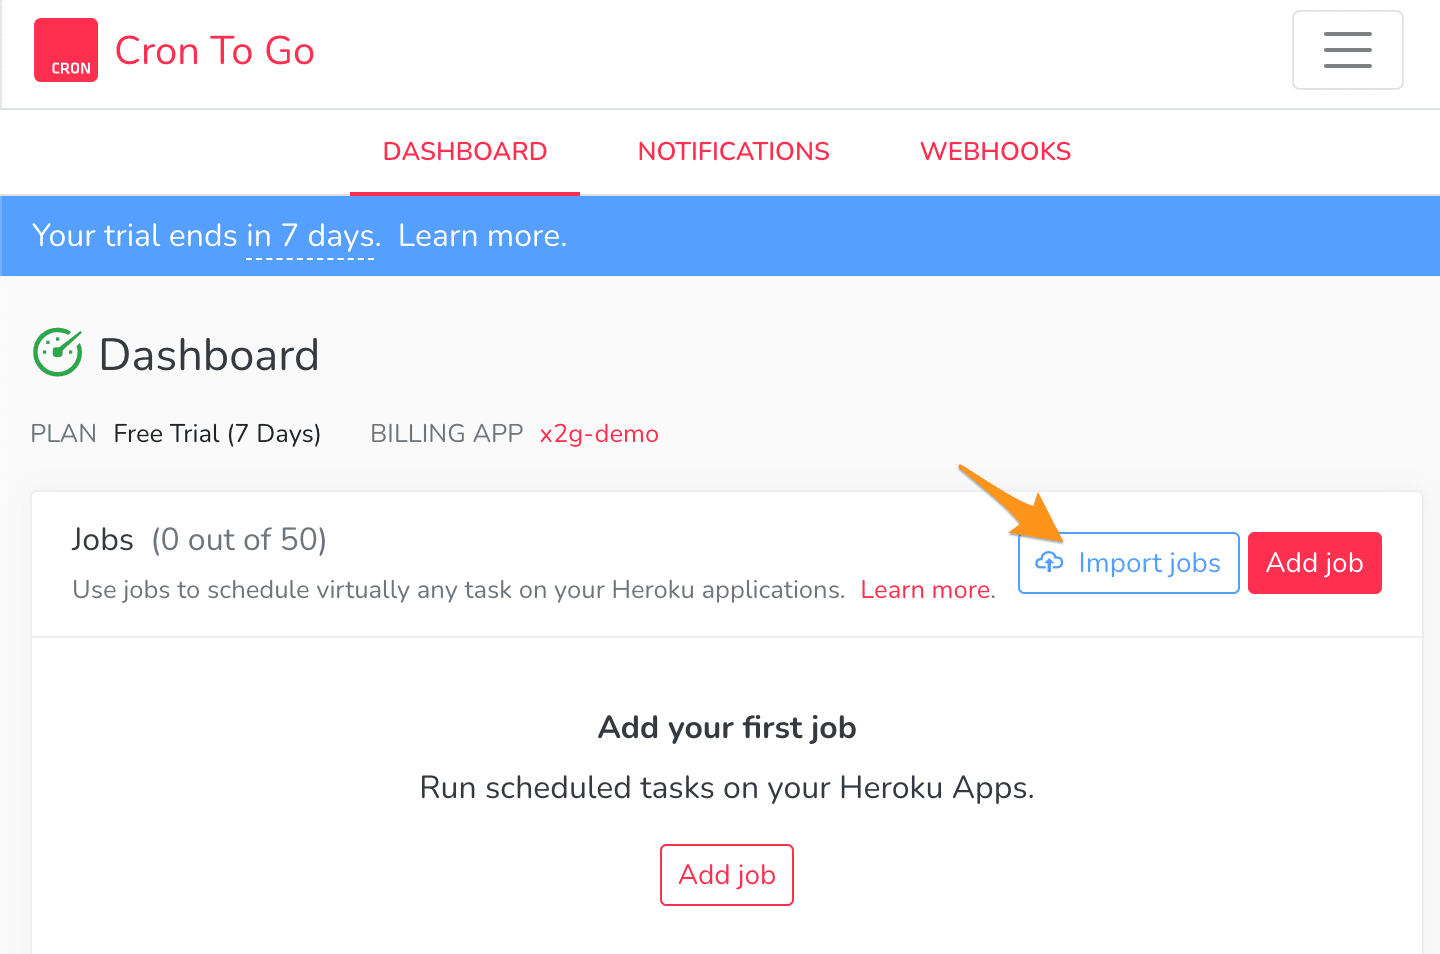
- Open your Cron To Go dashboard by clicking on it through your app’s resources dashboard. Then, click on the Import Jobs button:
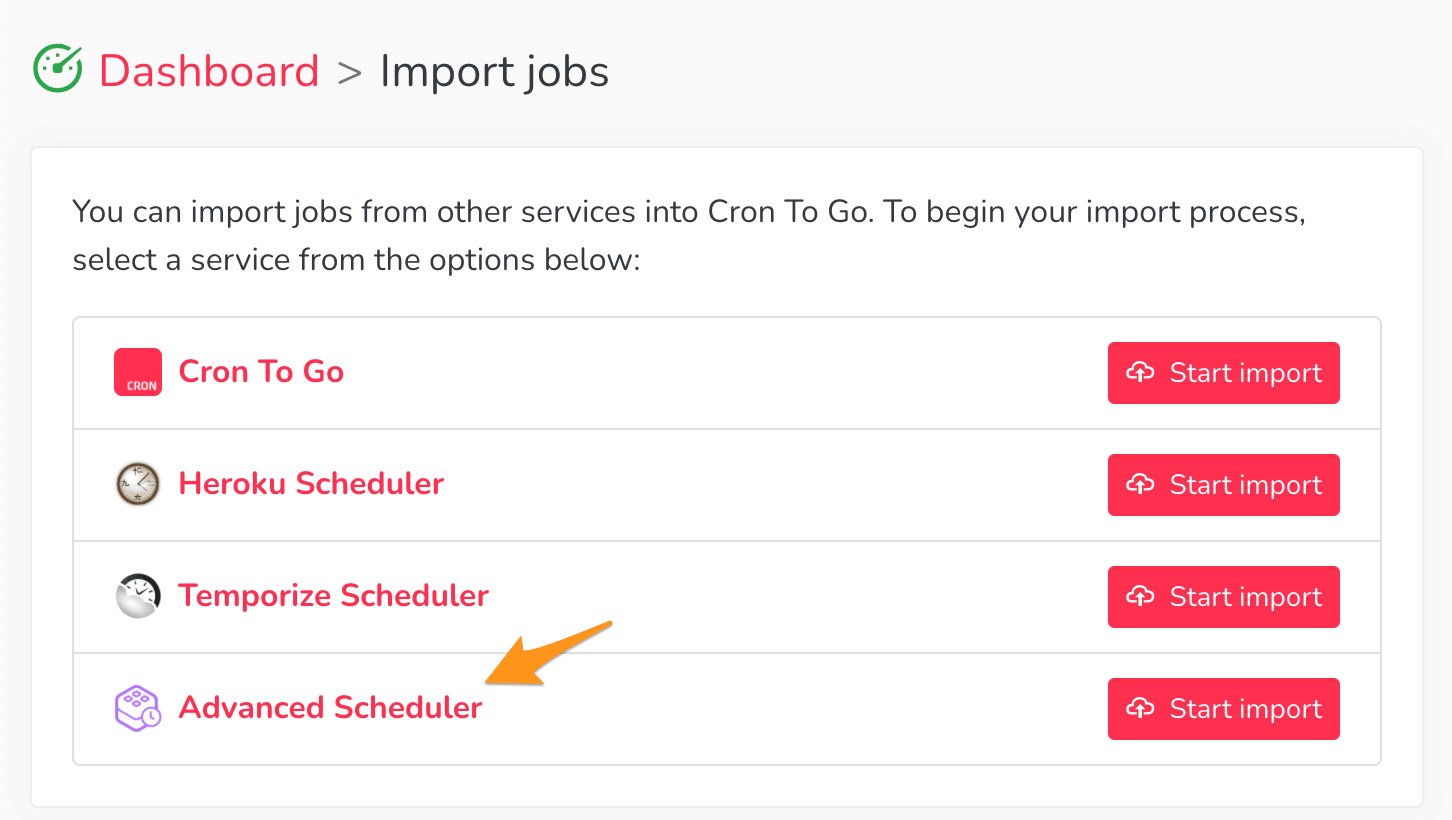
- Click on Advanced Scheduler from the pop-up list.
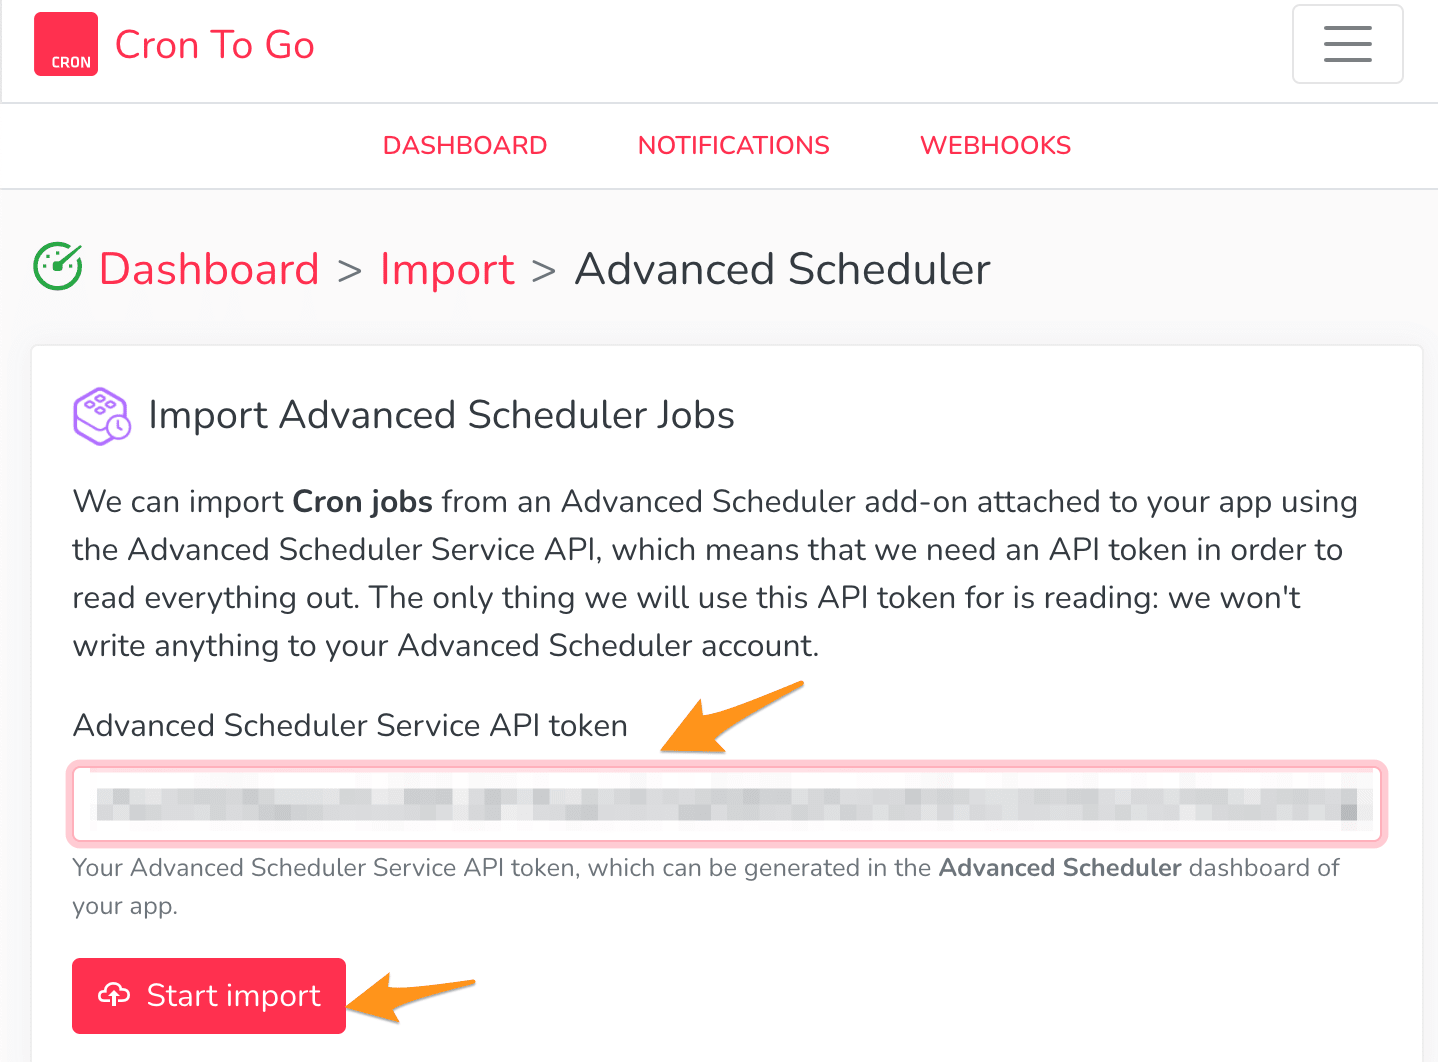
- Remember that API token we’ve copied to the clipboard in the first step? Just like Chekhov's gun, it’s time to use it in the 3rd step of the guide. Paste it in and click Start import.
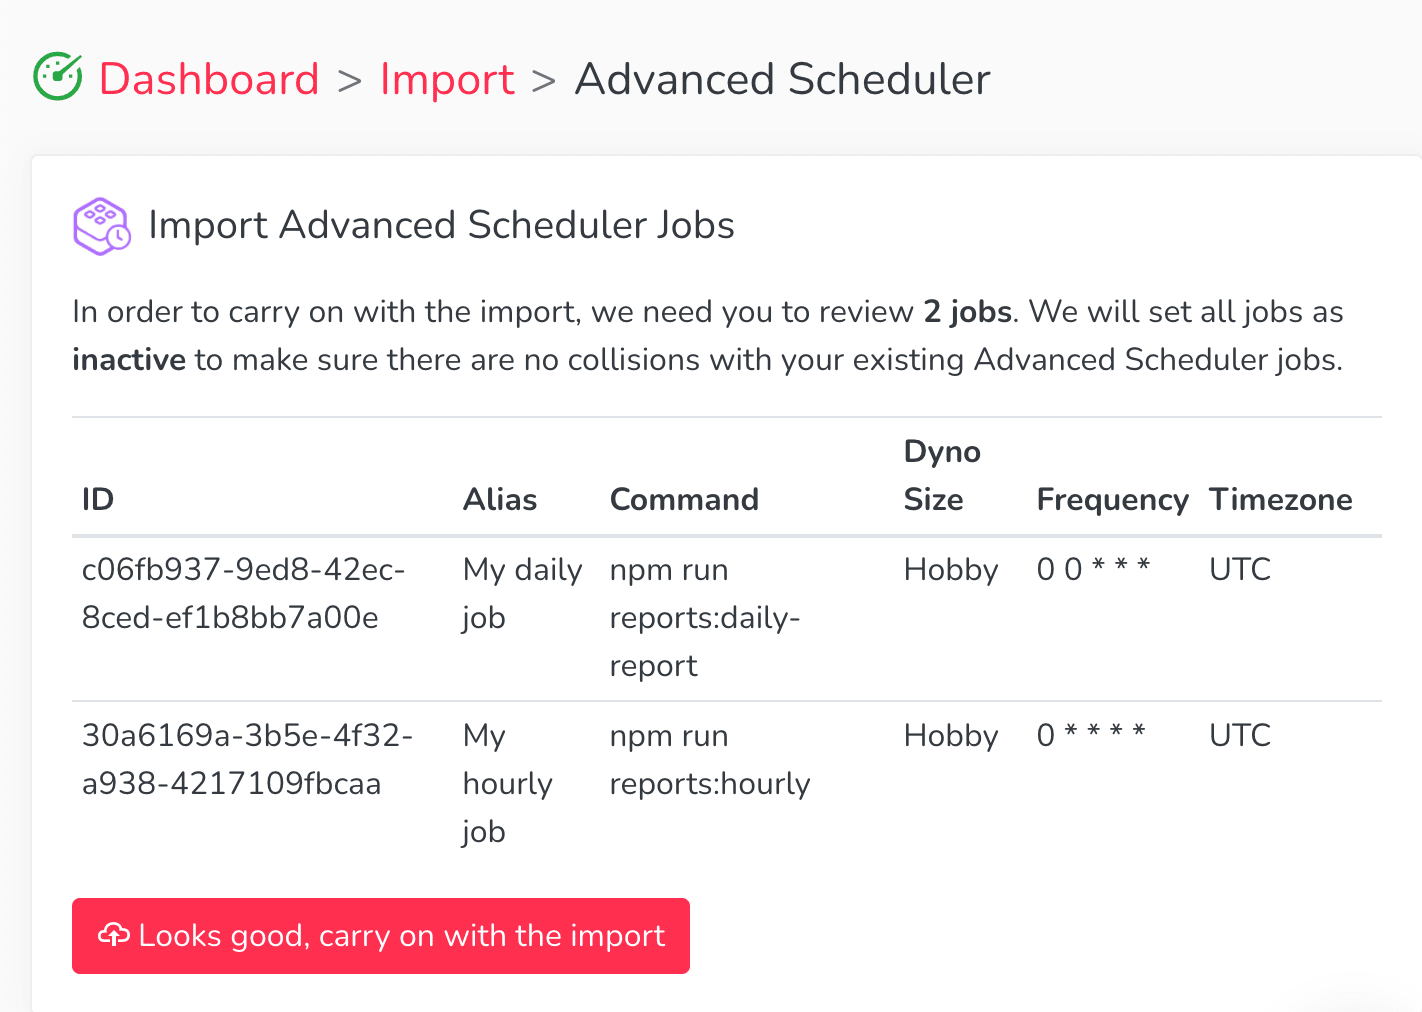
- Review the jobs that will be automatically created for you. Note that the jobs will be disabled by default until you disable them or deprovision Advanced Scheduler so that they don’t collide with your Advanced Scheduler triggers. Looking good? Keep calm and carry on with the import!
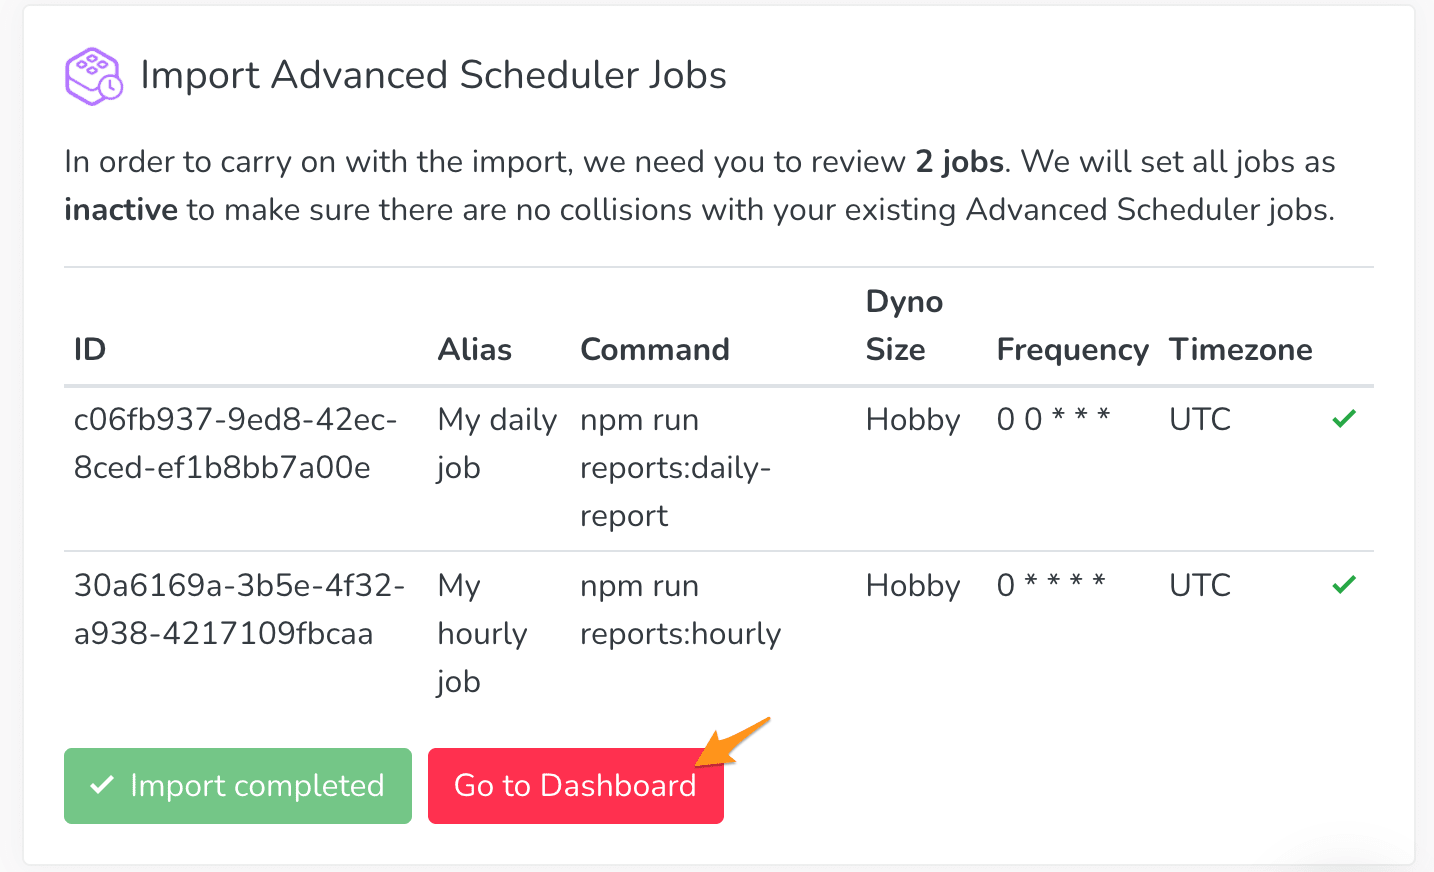
- You’ll be able to see the progress of the import process. Once the import is complete, click Go to Dashboard to review your new Cron To Go jobs and enable them.

Last but not least
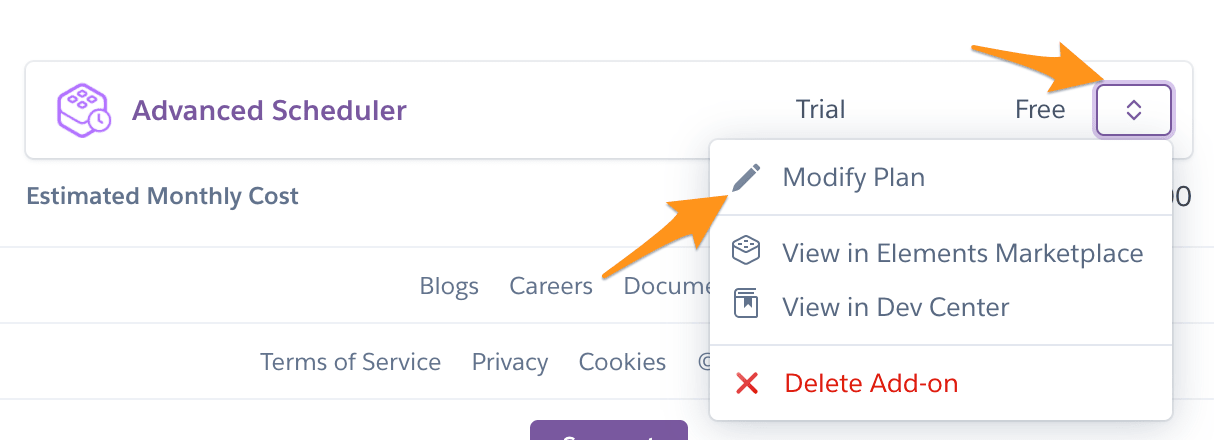
If you had to upgrade Advanced Scheduler in order to import your triggers, don’t forget to either modify your plan back to the original, or remove the add-on in case you’d like to stick with Cron To Go. You can do it through Heroku’s UI or the CLI.
To modify the plan:
heroku addons:upgrade advanced-scheduler:newplan -a [YOUR APP NAME]
To remove the add-on completely:
heroku addons:destroy advanced-scheduler -a [YOUR APP NAME]
We’ve also compiled a thorough features comparison in respect to Advanced Scheduler and Cron To Go to help you make the best decision regarding which solution best suits your needs. Thanks for reading!