
The Cron To Go team’s been hard at work to bring you four powerful new features, enhancing the flexibility and efficiency of our much loved Heroku task scheduling and monitoring solution.
These include:
- Email webhooks
- Test webhooks
- New dyno types
- Jitter
That’s not the end of it, as there are more awesome new features in the works, but let’s just do this one at a time—or four at a time, to be exact!
1. Email webhooks
This feature lets you receive notifications about job events directly via email. You can set it up to send alerts for when jobs start, complete, or fail, and stay informed about your scheduled tasks without needing to check the dashboard.
This new email webhooks feature lets you configure custom notifications for each job start, completion, and failure, bringing comprehensive event coverage.
In contrast, the existing email notifications feature sends alerts only for the first job failure and optionally when a job completes successfully after consecutive failures, focusing on critical status changes. You can learn more about it, Here.
Configuration:
- Go to your Cron To Go dashboard->-Webhooks tab, then click Add webhook.
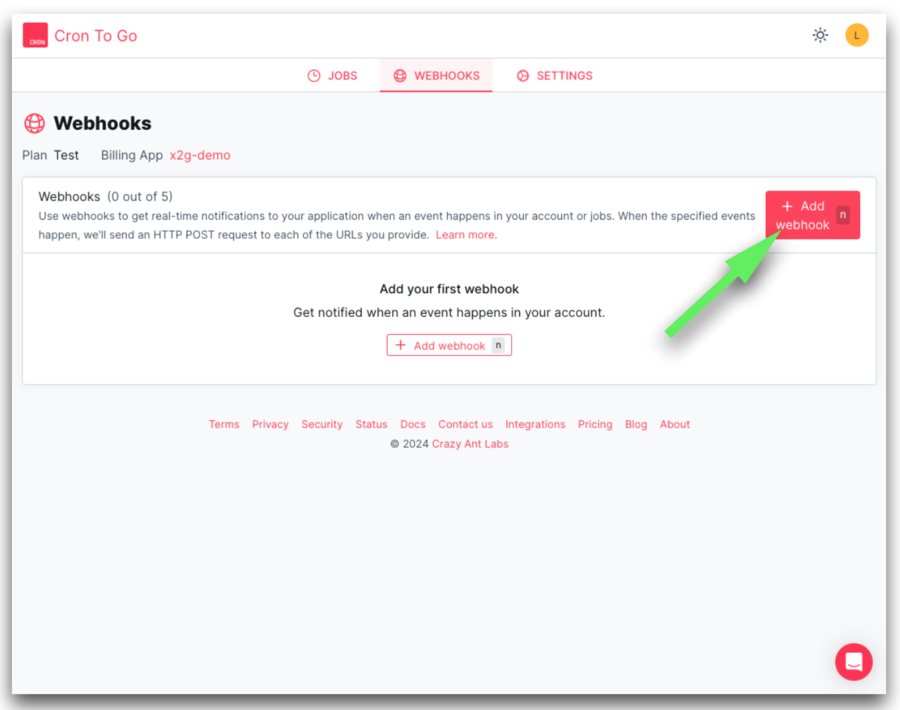
- Give your webhook a descriptive name
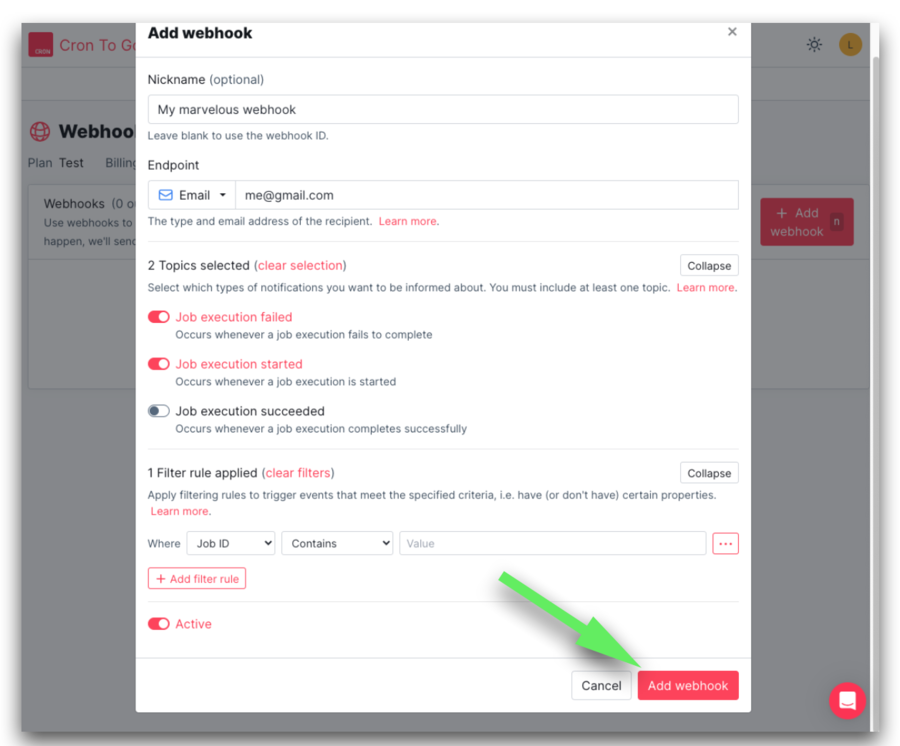
- In the dialog that opens, set the endpoint as Email and add the recipient's email address.
- Select the topics for which you want to receive notifications (e.g., job execution started, job execution failed, job execution succeeded).
- Set up filter rules as needed, then click Add Webhook.
Benefits:
- Improved monitoring and job management: Receive real-time updates directly in your inbox to stay ahead of failures and progress.
- Ease of implementation: Simple setup up and running in seconds.
You learn more about email webhooks, Here.
2. Test webhooks
This new feature lets you manually trigger a webhook event to ensure your endpoint is set up correctly and receiving notifications.
This replaces the previous ping functionality and offers a more straightforward way to test and troubleshoot your webhook integrations.
Configuration:
- Go to your Cron To Go dashboard->-Webhooks tab, then click Add webhook.
- After creating a webhook, you can manually send a test event to your endpoint by selecting Test webhook from the webhook management options, accessible via the three dots alongside the webhook entry.
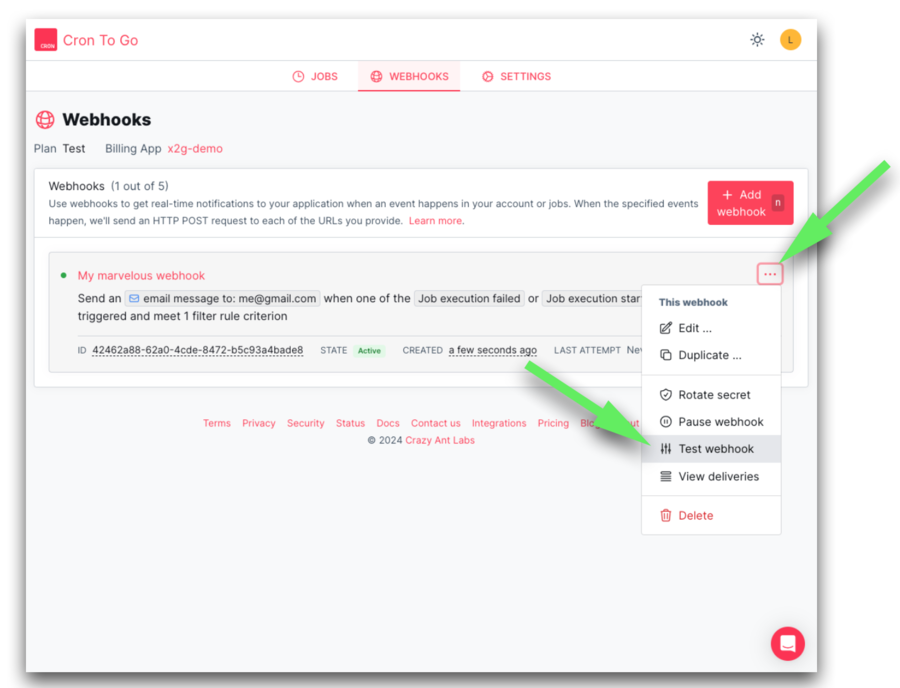
- This helps ensure that the webhook endpoint is correctly set up and can handle incoming notifications.
Benefits:
- Safe webhook management: Verify your webhook setup with manual tests before going live.
- Troubleshooting: Easily diagnose and fix issues with your webhooks.
You learn more about webhooks, Here.
3. New Dyno Types
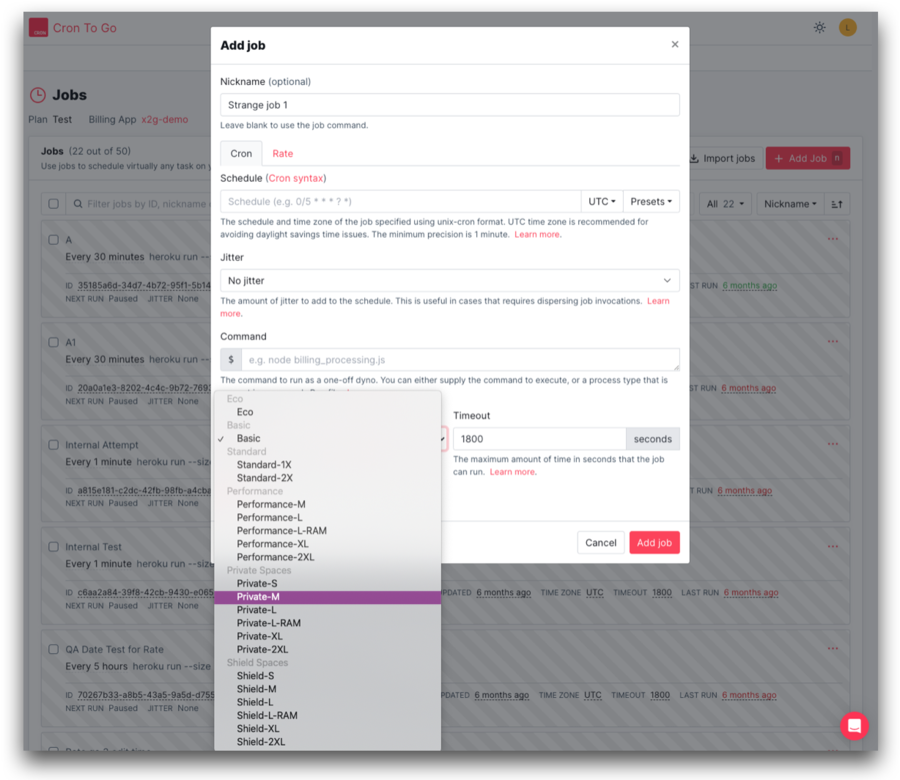
In response to user requests, Heroku and, therefore, Cron To Go now have a few extra dyno types, providing more options for selecting the right dyno size for your job’s unique performance and resource needs. These are:
- Performance-L-RAM, Performance-XL, and Performance-2XL for Heroku Common Runtime
- Private-L-RAM, Private-XL, and Private-2XL for Private Spaces
- Shield-L-RAM, Shield-XL, and Shield-2XL for Shield Private Spaces
This update gives users greater flexibility and helps optimize resource usage based on specific job requirements.
Configuration:
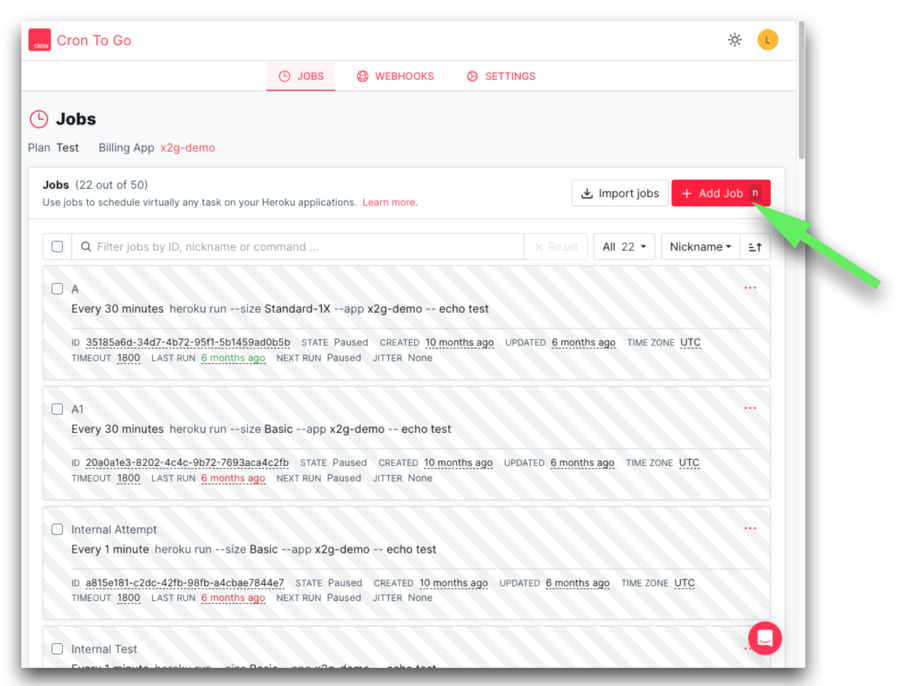
- Go to your Cron To Go dashboard->-Add Job to create a new job or click the three dots next to an existing job and select Edit Job.

- In the job definition interface, select the desired dyno type from the available options.
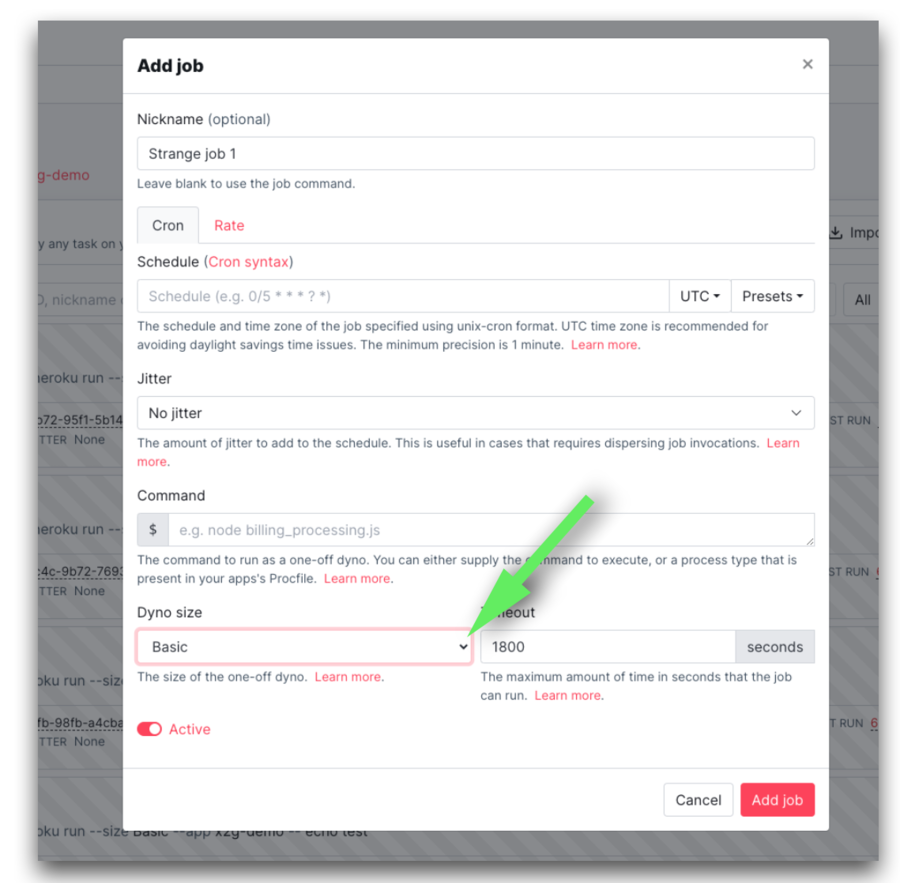
- Please note that only customers with an established payment history with Heroku can use performance-tier dynos.
Benefits:
- Increased flexibility: Choose from a wider range of dyno types to match your job requirements.
- Optimized resource usage: Select the appropriate dyno size for different jobs, improving efficiency and performance.
- Enhanced scalability: Better handle varying workloads with suitable dyno options.
You learn more about new dyno types, right Here.
4. Jitter
The jitter feature introduces a random delay to job start times, which helps spread out the load over time.
By adding jitter, you can avoid execution spikes and ensure a more stable and balanced system performance, especially useful in environments with frequent job schedules.
Configuration:
- Go to your Cron To Go dashboard->-Add Job to create a new job or click the three dots next to an existing job and select Edit Job.
- When defining a job, you can set the amount of jitter to add to the schedule by selecting a set or custom jitter time from the Jitter dropdown.
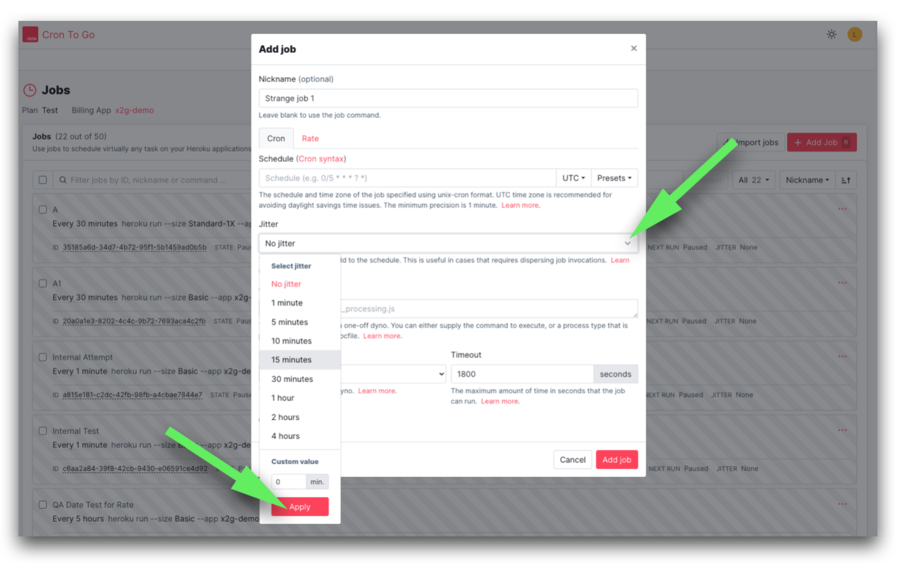
- Example: Configuring a 15-minute jitter for a schedule that runs every hour will invoke the job within 15 minutes after the next run.
Benefits:
- Load distribution: Spread out job executions to avoid spikes and evenly distribute load.
- Improved system stability: Prevent system overloads by dispersing job start times.
- Enhanced performance: Maintain consistent performance by avoiding simultaneous job executions.
You can learn more about the defining jobs and the Jitter setting, Here.
Ready to get started?
We’re excited to bring you these new features, designed to make your scheduling tasks with Cron To Go even more efficient and flexible. Explore our documentation for more details and start making the most of these fresh new features today!
We Value Your Feedback
Your insights are well received and highly prized at Cron To Go, and they’re central to our continuous innovation.
We keep improving thanks to your user feedback and insightful feature requests.
Feel welcome to share your experiences and suggestions through our in-app chat. Every bit of your feedback helps us better serve your needs.